Precision이나 Recall이 -1일 때는 areaRng의 small, medium, large가 데이터셋 분포에 맞게 잘 설정되었는지 확인해보자.
Average forward time: 0.54 ms, Average NMS time: 0.43 ms, Average inference time: 0.97 ms
 Average Precision  (AP) @[ IoU=0.50:0.95 | area=   all | maxDets=100 ] = 0.287
 Average Precision  (AP) @[ IoU=0.50      | area=   all | maxDets=100 ] = 0.443
 Average Precision  (AP) @[ IoU=0.75      | area=   all | maxDets=100 ] = 0.326
 Average Precision  (AP) @[ IoU=0.50:0.95 | area= small | maxDets=100 ] = -1.000
 Average Precision  (AP) @[ IoU=0.50:0.95 | area=medium | maxDets=100 ] = -1.000
 Average Precision  (AP) @[ IoU=0.50:0.95 | area= large | maxDets=100 ] = 0.287
 Average Recall     (AR) @[ IoU=0.50:0.95 | area=   all | maxDets=  1 ] = 0.483
 Average Recall     (AR) @[ IoU=0.50:0.95 | area=   all | maxDets= 10 ] = 0.535
 Average Recall     (AR) @[ IoU=0.50:0.95 | area=   all | maxDets=100 ] = 0.535
 Average Recall     (AR) @[ IoU=0.50:0.95 | area= small | maxDets=100 ] = -1.000
 Average Recall     (AR) @[ IoU=0.50:0.95 | area=medium | maxDets=100 ] = -1.000
 Average Recall     (AR) @[ IoU=0.50:0.95 | area= large | maxDets=100 ] = 0.535
잘 보면 area=small과 area=medium에서만 -1.000이 표시되는 것을 확인할 수 있다. 간단하게 COCOeval의 areaRng parameter를 변경하여 문제를 해결할 수 있다. 넣어야 하는 값은 데이터셋 내 Bounding box의 distribution을 직접 분석하여 구하자. (여기에서 COCO 데이터셋 내 객체들은 small이 41%, medium이 34%, 나머지 large가 24%라고 한다.)
하지만 이렇게 되면 일반적으로 여러 논문에서 표시하는 $AP_S$, $AP_M$, $AP_L$ metric과 비교할 수 없게 된다는 문제점이 있으므로 주의하자.
기본 COCO Python Evaluator COCOEval에서는 아래 3개의 기준으로 all, small, medium, large 크기를 구분한다. COCO paper에서는 이러한 언급이 별도로 없지만 COCO Evaluation API에서 해당 내용을 구현한다(원본 코드 보러가기)
all: $0$ ~ $10000^2$
small: $0$ ~ $32^2$
medium: $32^2$ ~ $96^2$
large: $96^2$ ~ $10000^2$
Custom COCO-style Dataset이 이러한 크기보다 훨씬 큰 Object만을 가지고 있다면 이중 일부는 -1.000으로 표시되는 것으로 파악된다.
Could not load library libcudnn_cnn_infer.so.8. Error: libnvrtc.so: cannot open shared object file: No such file or directory
Anaconda/Miniconda로 최신 PyTorch 2.0과 CUDA 라이브러리(pytorch-cuda=11.8)를 설치하고 PyTorch 라이브러리를 로드할 때 이런 오류가 발생하는 경우가 있다.
해당 문제는 pytorch-cuda로 설치된 libnvrtc.so 파일이 제대로 링크되지 않아 발생한 문제이다. 이를 해결하기 위해서는 아래와 같이 기존의 libnvrtc.so.11.2나 libnvrtc.so.11.8 등을 프로그램이 열심히 찾고있는 libnvrtc.so로 링크해주면 된다.
현재 사용중인 conda 환경을 activate하고, 아래 Snippet을 실행하여 링크를 진행하여 문제없이 작동하였다.
Tensorflow on RTX 3000 series (RTX 3070, RTX 3080, RTX 3090)
빌드 환경 (Build environment)
OS: Windows 10 Education (Build 19042.608) Architecture: x86_64 (amd64) Git branch: v2.4.0-rc0 Python: 3.7 (anaconda) Target CUDA and CUDNN: CUDA 11.1 Update 1, CUDNN v8.0.5 (Novemvber 9th, 2020) (requires login) Target arch: CC 8.6, 6.1 → Must be also usable on GTX 1000 series! Numpy: 1.19.4 (Must be manually reinstalled back to version 1.19.3 before using!)
Closing application while tensorflow library loads always failes – might be a buggy codes?
another unknown restriction would exist – this is a test build for my own use, so use with care! I will edit this article when tensorflow officially supports RTX3000 series (or tested).
Windows Insider Preview 버전 문제 (2020-10-16 빌드에서 해결됨)
Windows 10 Insider Preview 버전에 따라서, WSL2나 CUDA가 아예 동작하지 않는 경우가 많습니다. 여기에서 버전별 작동여부를 확인 후에 설치하시는것이 좋을것 같네요.
WSL2에서 Ubuntu와 CUDA 사용하기
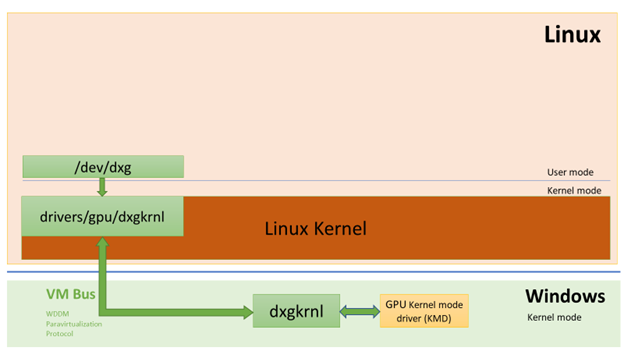
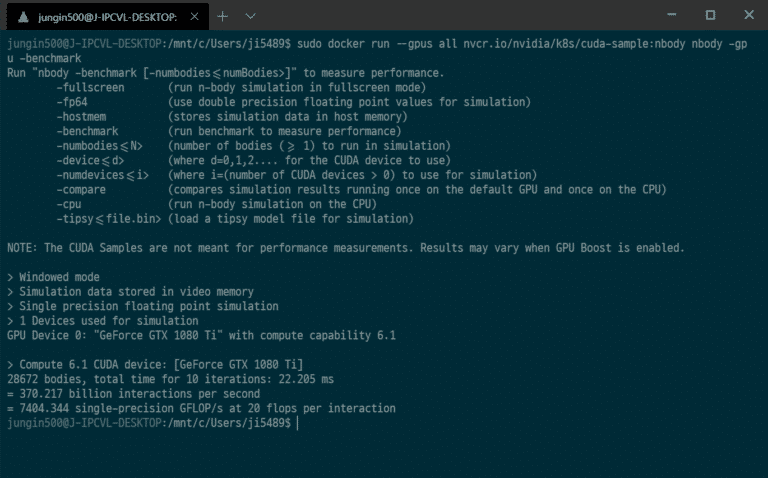
이제 Windows 10 Build 2020에서는 Windows Subsystem for Linux 2와 GPU 가속 지원 기능을 함께 사용할 수 있습니다. 이 가이드에서는 Windows 10 디바이스에서 WSL2와 Ubuntu를 이용하여 CUDA 개발 환경을 구축할 수 있도록 합니다.
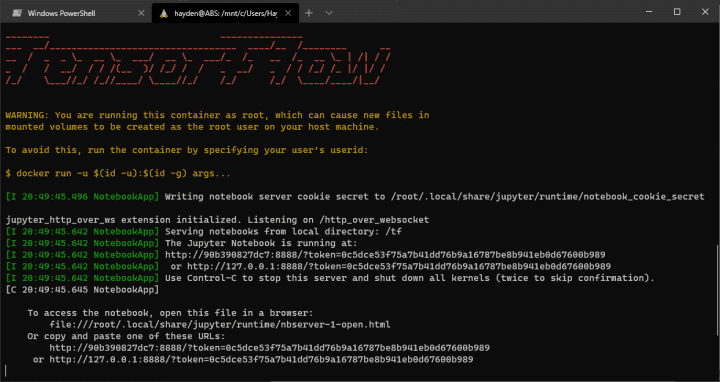
이 튜토리얼에서는 WSL에 Docker를 구동하여, 결과적으로 Jupyter Notebook 내에서 CUDA를 End-to-End로 실행할 수 있도록 합니다. 구체적으로는 아래와 같은 구성으로 진행됩니다.
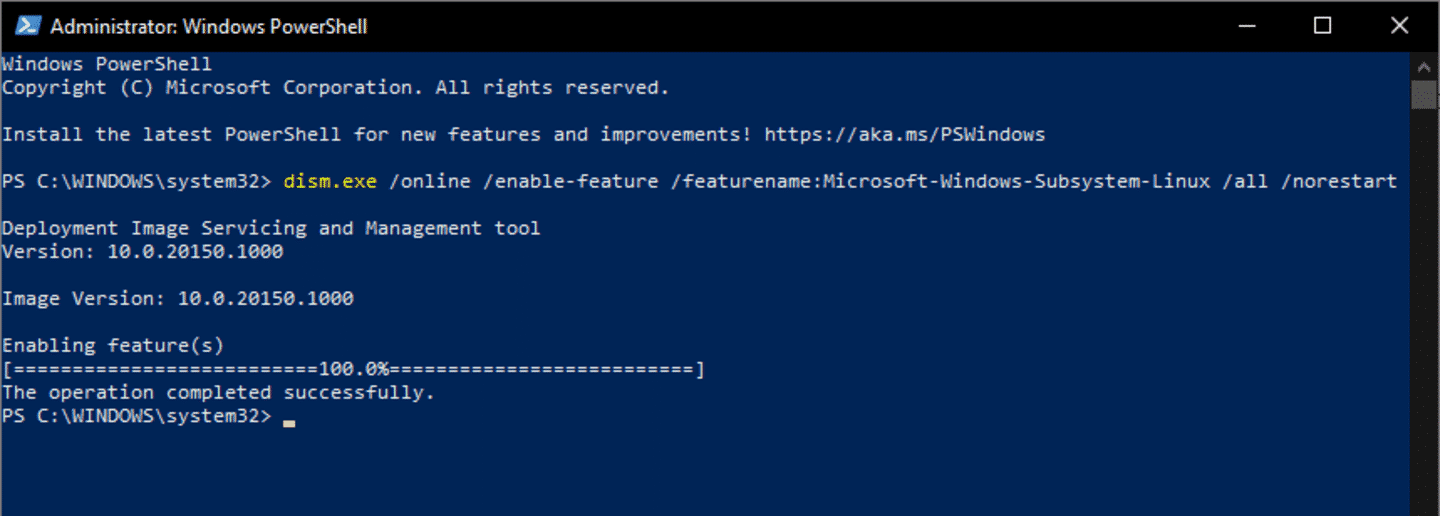
이 과정에 앞서, 설치된 Windows 10을 2020년 6월 17일자로 릴리즈된 Windows 10 Insider 빌드로 업그레이드해야 합니다. 이를 위해서 Windows Insider에 가입하여, 사용중인 기기를 Dev Channel에 등록할 수 있습니다(주로 “Fast Ring” 또는 한국어로 “초기”라고도 쓰입니다). 이 후, Windows 10 빌드 20150 버전으로 업그레이드할 수 있습니다.
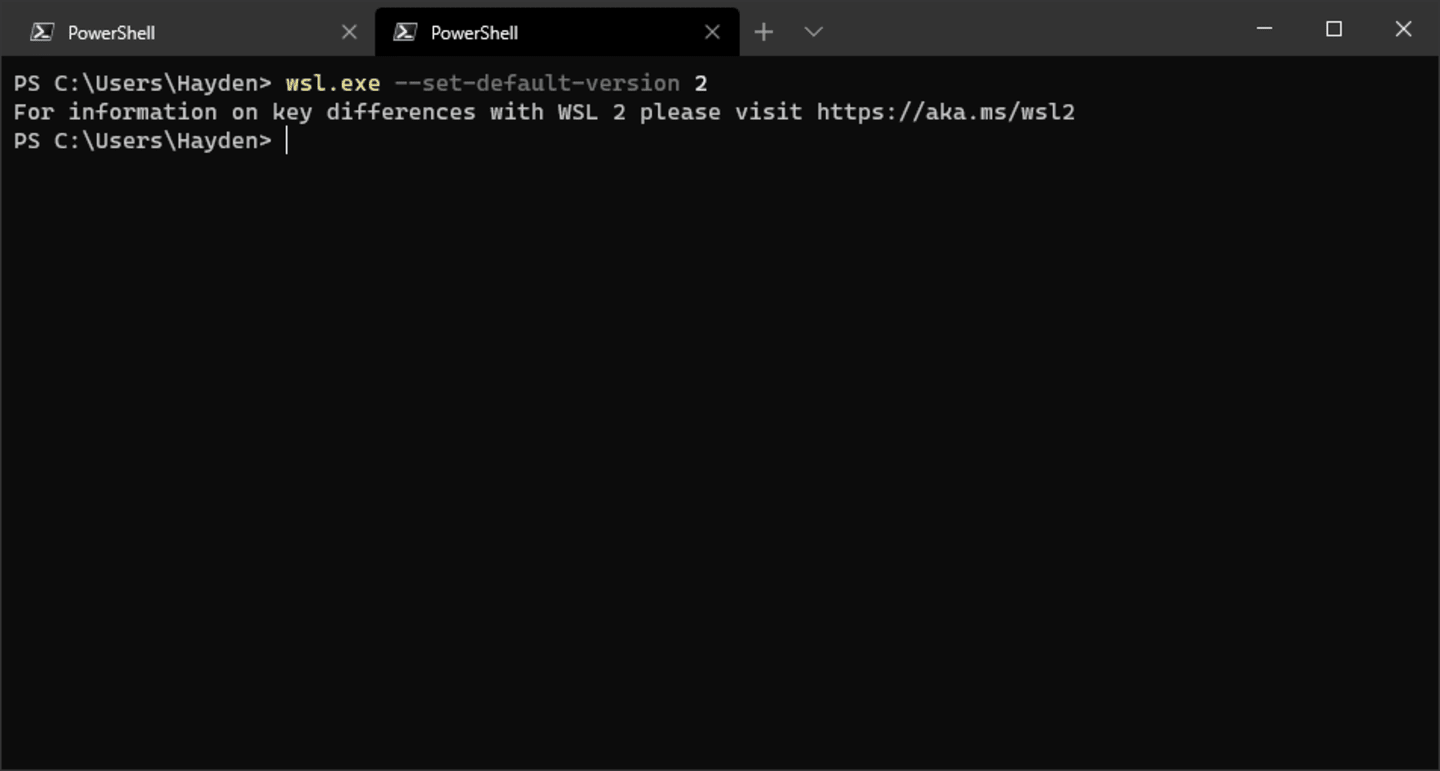
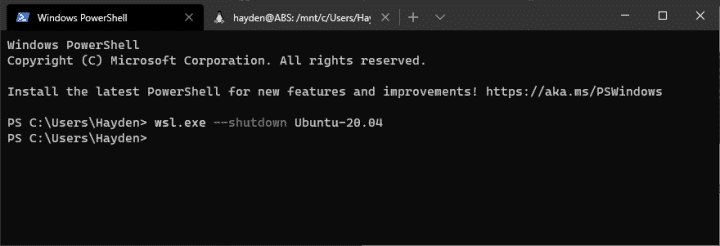
이제 재부팅을 완료하면, 시스템이 WSL2를 구동할 수 있는 상태입니다. 다만, 아직은 호환성 등을 이유로 기본값은 WSL Version 1입니다. 아래 코드로 기본 버전을 변경할 수 있습니다(원할 시 Distro마다, 기존 Version 1으로 다시 설치할 수 있습니다)
Windows Terminal은 MS사에서 개발한 대체 터미널 어플리케이션입니다. 기존 MobaXterm이나 Cygwin, ConEmu 등의 솔루션을 대체할 수 있는 Lightweight한 오픈소스 터미널 도구입니다(링크 또는 GitHub). 화면 렌더링의 GPU 가속 및 커스터마이징 등, 다양한 기능들을 가지고 있으며 기존 Windows의 콘솔(cmd, powershell)을 이어 더 나은 사용성을 제공합니다.
Microsoft Store으로부터 Windows Terminal 다운로드
WSL에서 Ubuntu 설치하기
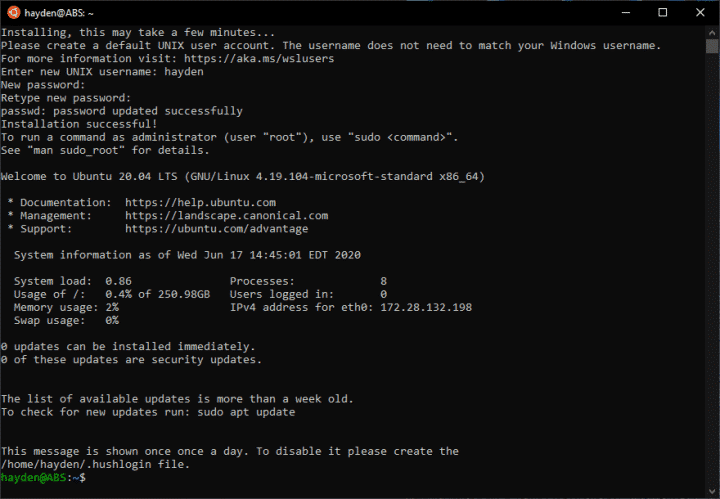
Windows의 시작 메뉴에서 Ubuntu를 선택하고, 초기 실행이므로 WSL내의 Ubuntu 사용자를 설정합니다. 이 Ubuntu 사용자와 Windows 사용자는 독립입니다(서로 관계가 없으며 이름이 같아도 됩니다).
WSL 초기 실행 시 Linux 계정(사용자) 생성하기
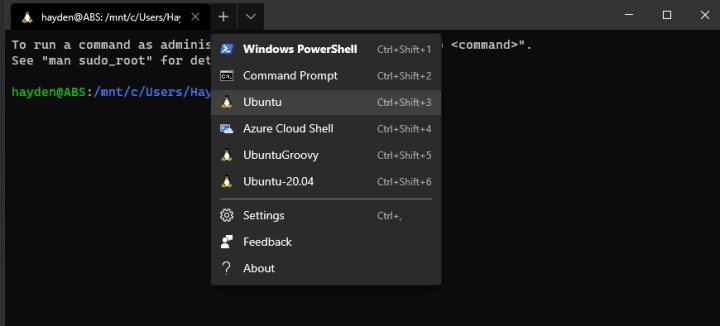
이전 단계에서 Windows Terminal을 다운로드받았다면, 사용자를 생성했던 이전 콘솔을 닫고, + 아이콘을 눌러 새로운 Ubuntu 콘솔을 열 수 있습니다:
새로운 Ubuntu 콘솔 열기
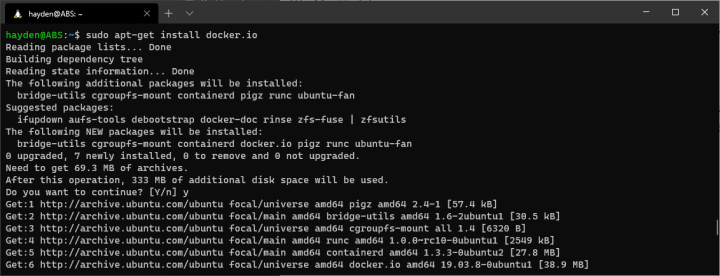
이제, 설치가 완료되었으므로 Ubuntu가 WSL2에서 구동되는지 확인해봅니다:
uname -r
Ubuntu의 커널 버전 확인
커널 버전을 확인했을 때, 4.19.121보다 높아야 합니다. ※ 그렇지 않다면, 아래 명령어를 cmd 또는 powershell 터미널에서 실행해보세요:
wsl.exe --update
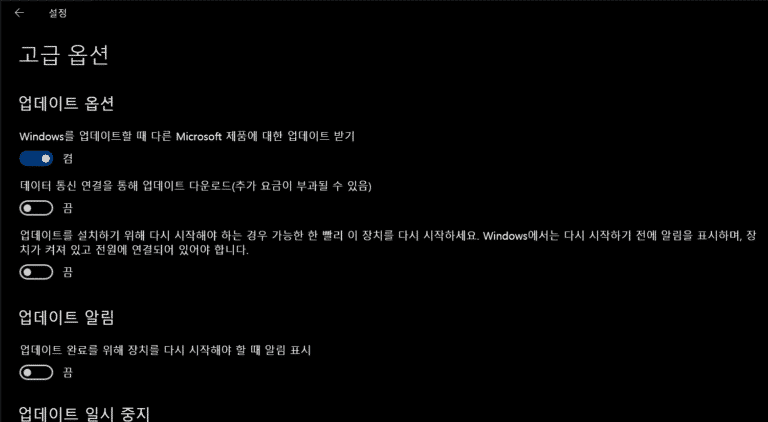
위 명령어를 실행한 뒤에도 동일한 커널 버전으로 나타난다면(WSL이나 Windows를 재시작해야할 수도 있습니다), Windows Updates 설정에서 “고급 옵션 > Windows를 업데이트할 때 다른 Microsoft 제품에 대한 업데이트 받기”가 켜져 있는지 확인합니다:
Windows Update “고급 옵션” 창 (변경할 설정확인이 쉽도록 한글로 써 두었습니다.)
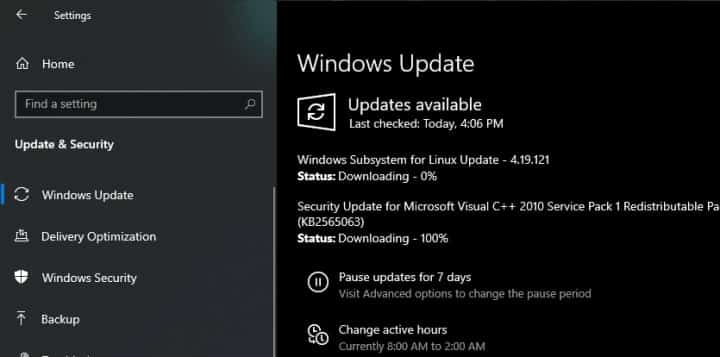
이 뒤에, Windows Update를 다시 확인합니다.
Windows 업데이트 시 “Windows Subsystem for Linux Update” 표시
The new Tensorflow 2.0 is going to standardize on Keras as its High-level API. The existing Keras API will mostly remain the same, while Tensorflow features like eager execution, distributed training and other deeper Tensorflow integration will be added or improved. I think it’s a good time to revisit Keras as someone who had switched to use PyTorch most of the time.
It turns out that implementing a custom image augmentation pipeline is fairly easy in the newer Keras. We could give up some flexibility in PyTorch in exchange of the speed up brought by TPU, which is not yet supported by PyTorch yet.
Source Code
GPU version (with a Tensorboard interface powered by ngrok)
I updated the model architecture from the official Keras example and modified some of the data preparation code.
Custom Augmentation using the Sequence API
From the Keras documentation:
[Sequence](https://keras.io/utils/) are a safer way to do multiprocessing. This structure guarantees that the network will only train once on each sample per epoch which is not the case with generators.
Most Keras tutorials use the ImageDataGenerator class to generate batch and do image augmentation. But it doesn’t leave much room for customization (unless you spend some time reading the source code and extend the class) and the augmentation toolbox might not be comprehensive or fast enough for you.
Note the one major difference between Sequence and Dataset is that Sequence returns an entire batch, while Dataset returns a single entry.
In this example, the data has already been read in as numpy arrays. For larger datasets, you can store paths to the image files and labels in the file system in the class constructor, and read the images dynamically in the __getitem__ method via one of the two methods:
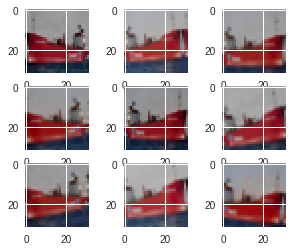
Now we use albumentations to define a set of augmentations to be applied randomly to training set and a (deterministic) set for the test and validation sets:
Augmented Samples
ToFloat(max_value=255) transforms the array from [0, 255] range to [0, 1] range. If you are tuning a pretrained model, you’ll want to use Normalize to set mean and std.
Training and Validating
Just pass the sequence instances to the fit_generator method of an initialized model, Keras will do the rest for you:
By default Keras will shuffle the batches after one epoch. You can also choose to shuffle the entire dataset instead by implementing a on_epoch_end method in your Sequence class. You can also use this method to do other dynamic transformations to the dataset between epochs (as long as the __len__ stay the same, I assume).
That’s it. You now have a working customized image augmentation pipeline.
The batch size used by Colab TPU is increased to utilize the significantly larger memory size (64GB) and TPU cores (8). Each core will received 1/8 of the batch.
Converting Keras Models to use TPU
Like before, one single command is enough to do the conversion:
But because the training pipeline is more complicated than the Fashion-MNIST one, I encountered a few obstacles, and had to find ways to circumvent them:
The runtime randomly hangs or crashes when I turn on multiprocessing=True in fit_generator method, despite the fact that Sequence instances should support multiprocessing.
The TPU backend crashes when Keras has finished first epoch of training and starts to run validation.
No good way to schedule training rate. The TPU model only supports tf.train optimizers, but on the other hand the Keras learning rate schedulers only support Keras optimizers.
The model gets compiled four times (two when training, two when validating) at the beginning of fit_generator call, and the compile time is fairly long and unstable (high variance between runs).
The corresponding solutions:
Use multiprocessing=False. This one is obvious.
Run a “warmup” round of one epoch without validation data seems to solve the problem.
The Tensorflow 2.0 version of Keras optimizer seems to work with TPU models. But as we’re using the pre-installed Tensorflow 1.13.1 on Colab, one hacky solution is to sync the TPU model to CPU and recompile the model using an optimizer with a lower learning rate. This is not ideal, of course. We’d waste 5 ~ 20 minutes syncing and recompiling the model.
This one unfortunately I couldn’t find good way to avoid it. The reason why the model get compiled four times is because the last batch has a different size from the previous ones. We could reduce the number to three if we just drop the last batch in training (I couldn’t find a way to do that properly in Keras). Or reduce the number to two if we pick a batch size that is a divisor to the size of the dataset, which is not always possible or efficient. You could just throw away some data to make things easier if your dataset is large enough.
Summary
The TPU (TPUv2 on Google Colab) greatly reduces the time needed to train an adequate model, albeit its overhead. But get ready to deal with unexpected problems since everything is really still experimental. It was really frustrating for me when the TPU backend kept crashing for no obvious reason.
The set of augmentations used here is relatively mild. There are a lot more options in the albumentations library (e.g. Cutout) for you to try.
If you found TPU working great for you, the current pricing of TPU is quite affordable for a few hours of training (Regular $4.5 per hour and preemptible $1.35 per hour). (I’m not affiliated with Google.)
In the future I’ll probably try to update the notebooks to Tensorflow 2.0 alpha or the later RC and report back anything interesting.